A Late Christmas Robe

a collaboration with SewEssential

Lightweight jacket or dressing robe?

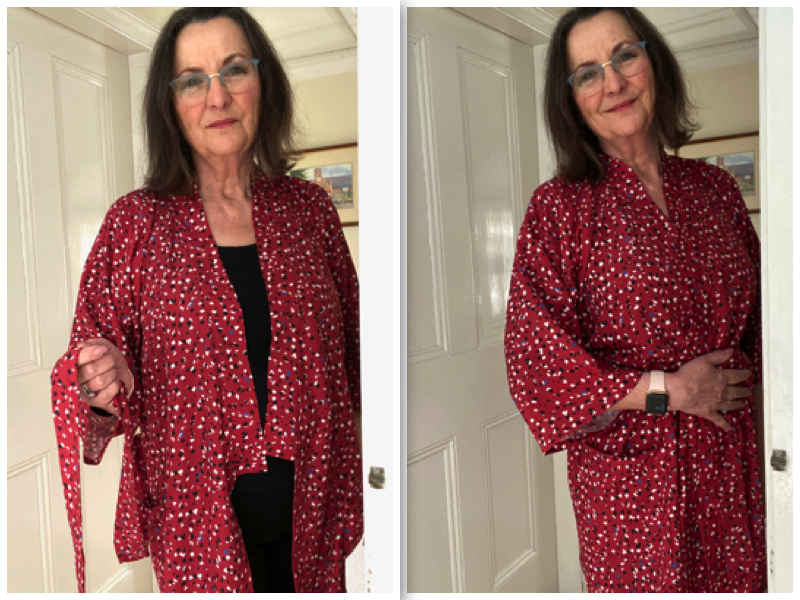
I made a crepe de chine robe for my daughter this Christmas, it’s a good giving option, the sizing and the sewing are both untaxing.  I liked it so much I wanted one for myself, so when Lucy from SewEssential.co.uk suggested a collaboration using a John Kaldor Crepe de Chine there was no contest as to what I would make with it.  

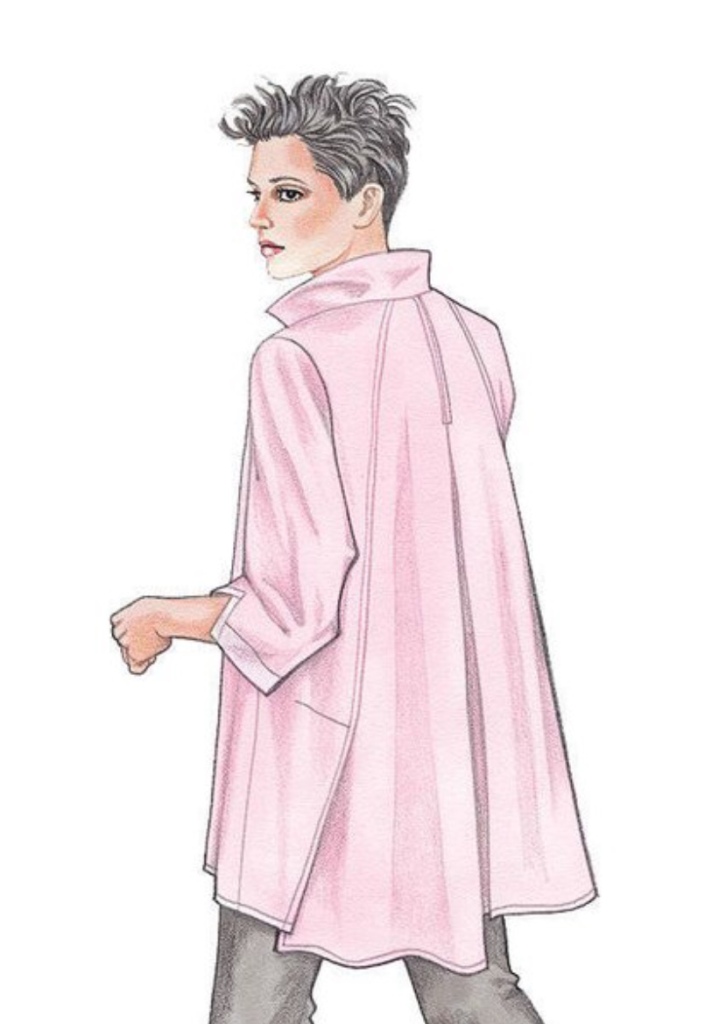
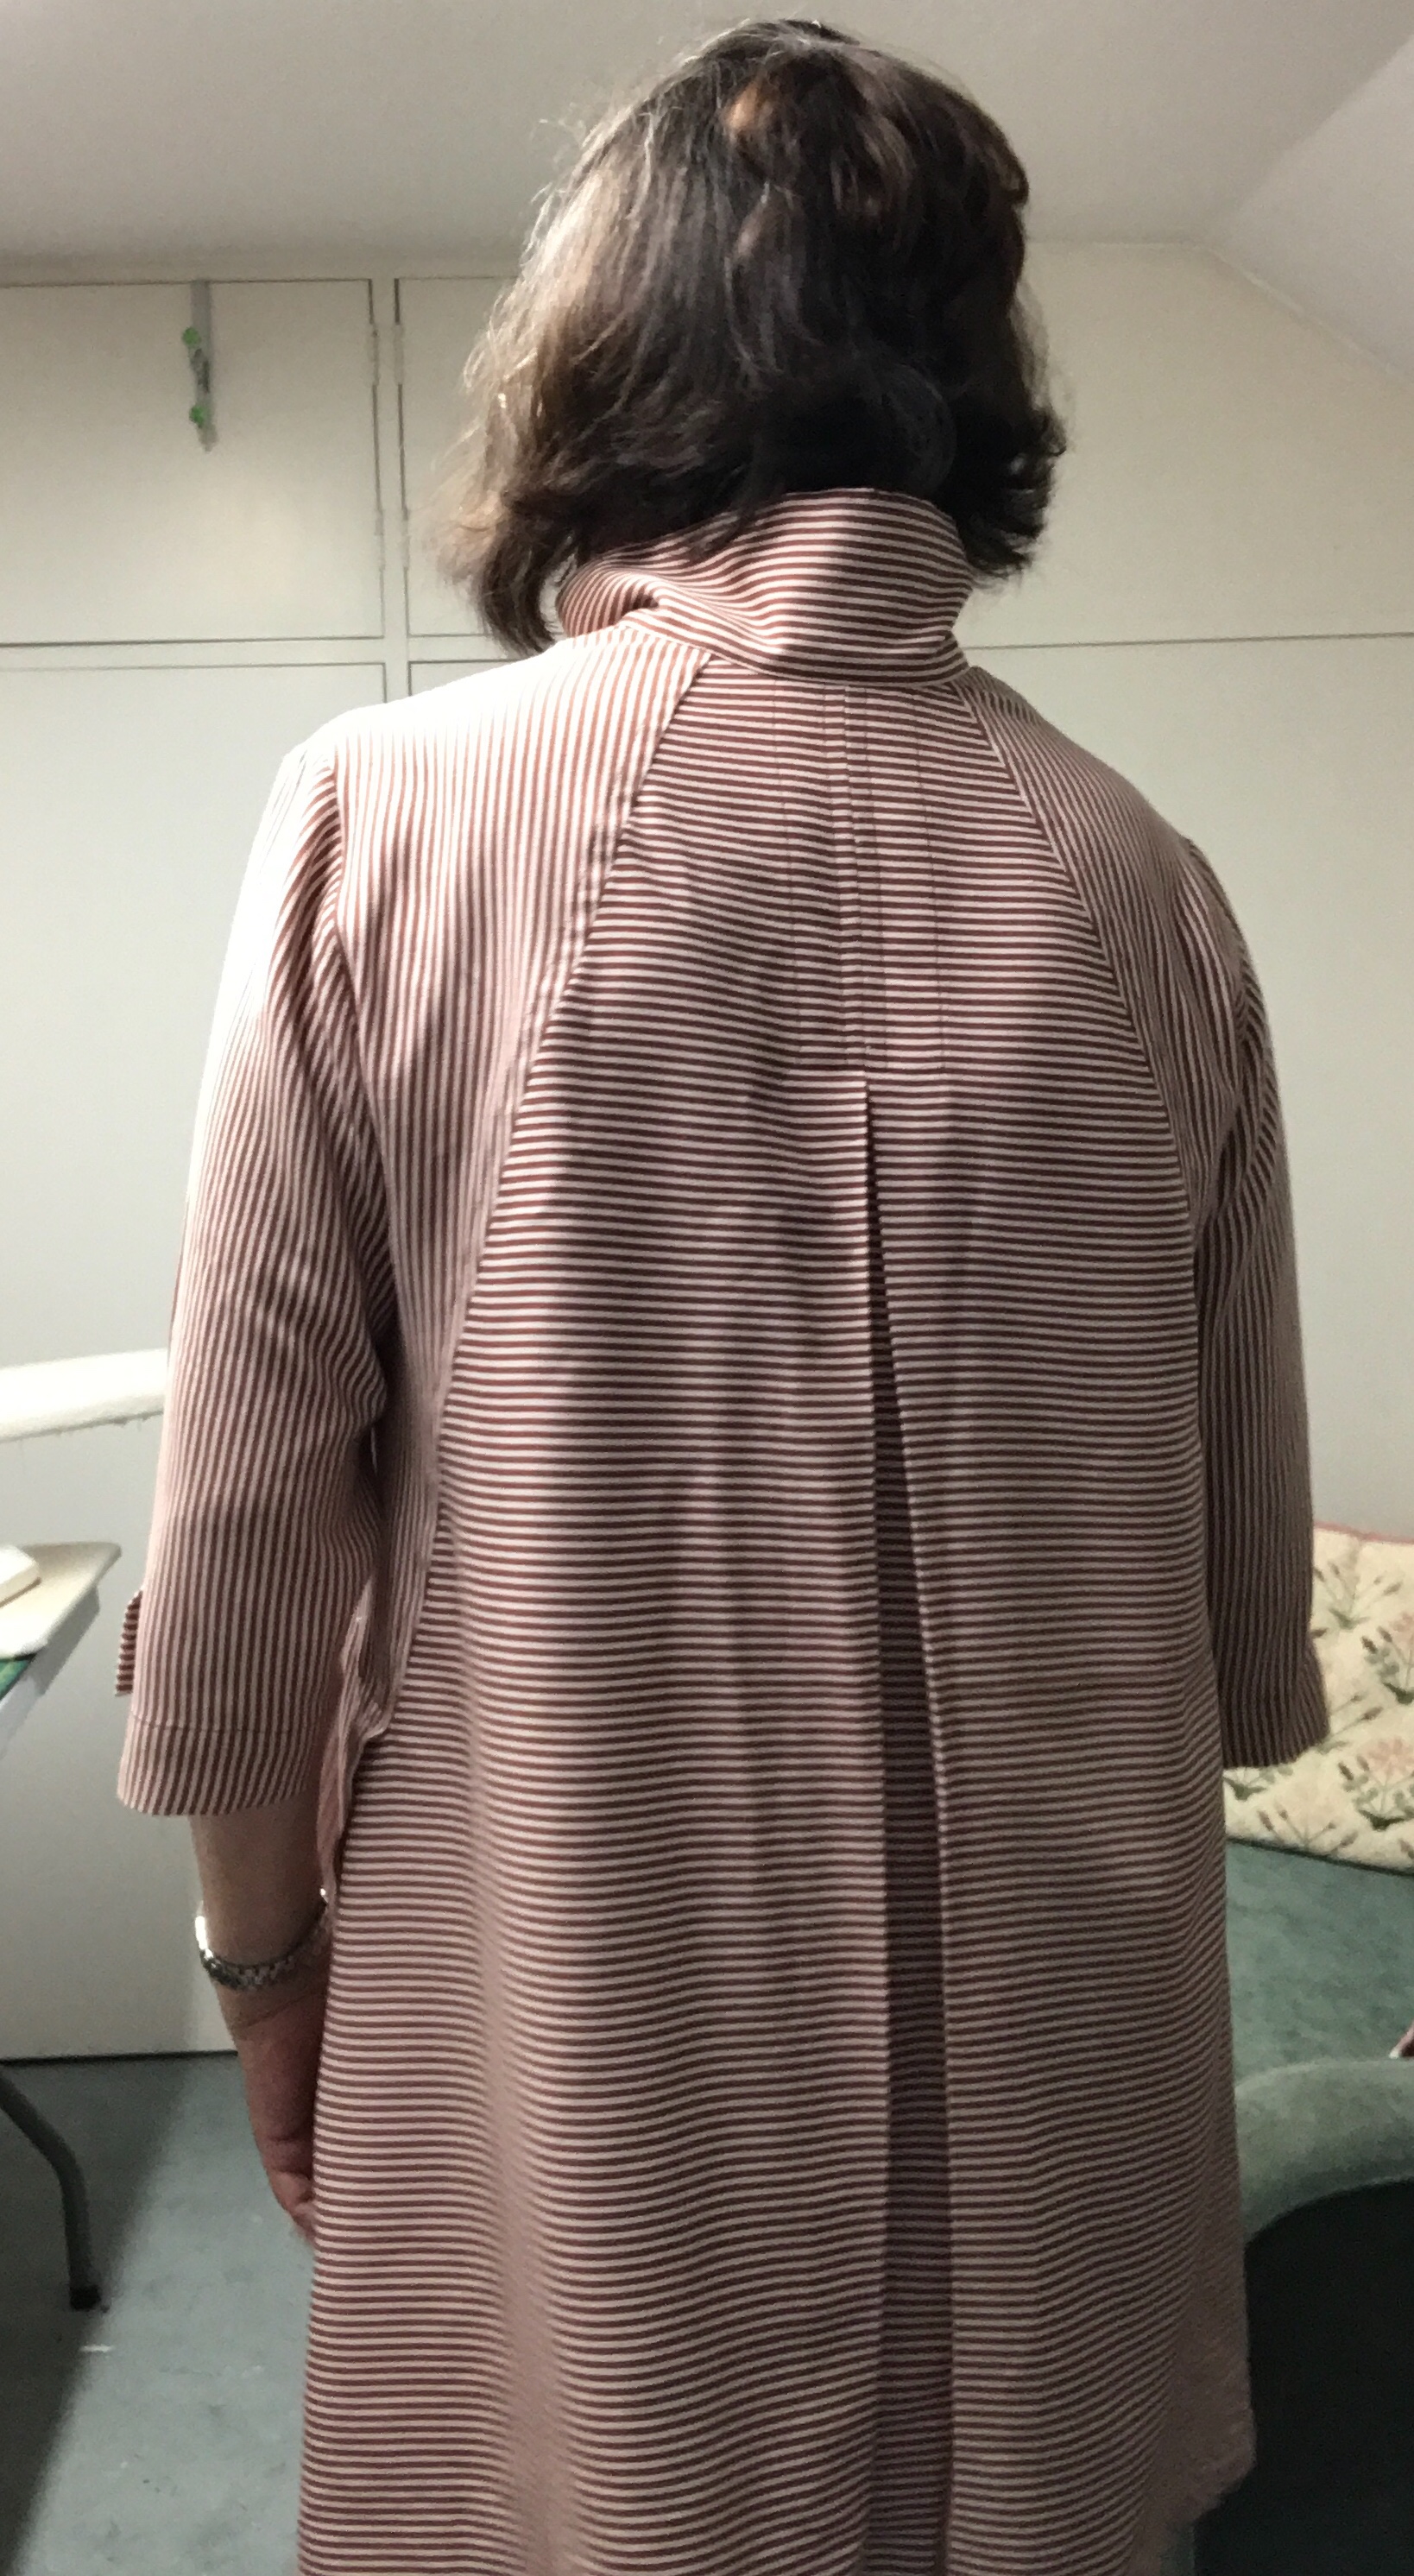
I used Jalie 3889 Melanie Robe, it is a Kimono inspired shaped jacket, which depending on the fabric choice can be a dressing robe, beach cover up, slinky jacket or cosy cardigan.  My Polyester Crepe de Chine – which weighs in at a lightweight 85 gsm – puts my garment into the Dressing Robe category. The pattern is in 27 sizes from age 2 up to 50” bust.

The fabric is light but not too slippery.  It has a tendency to move when cutting out.  I used long fine sharp pins to secure the pattern pieces.  My fabric has a small overall design so I wasn’t concerned about matching the pattern, but had I been I would have cut the pieces singly.  Occasionally even my very sharp pins struggled to pierce the fabric, at first I thought they might be blunt (they were new!) But I found by moving them to a slightly different position they went through fine.  I think the polyester fibre is tightly woven and quite resistant, but generally the pins slipped into it nicely, and didn’t leave any marks.  Something to consider when using fine fabrics.

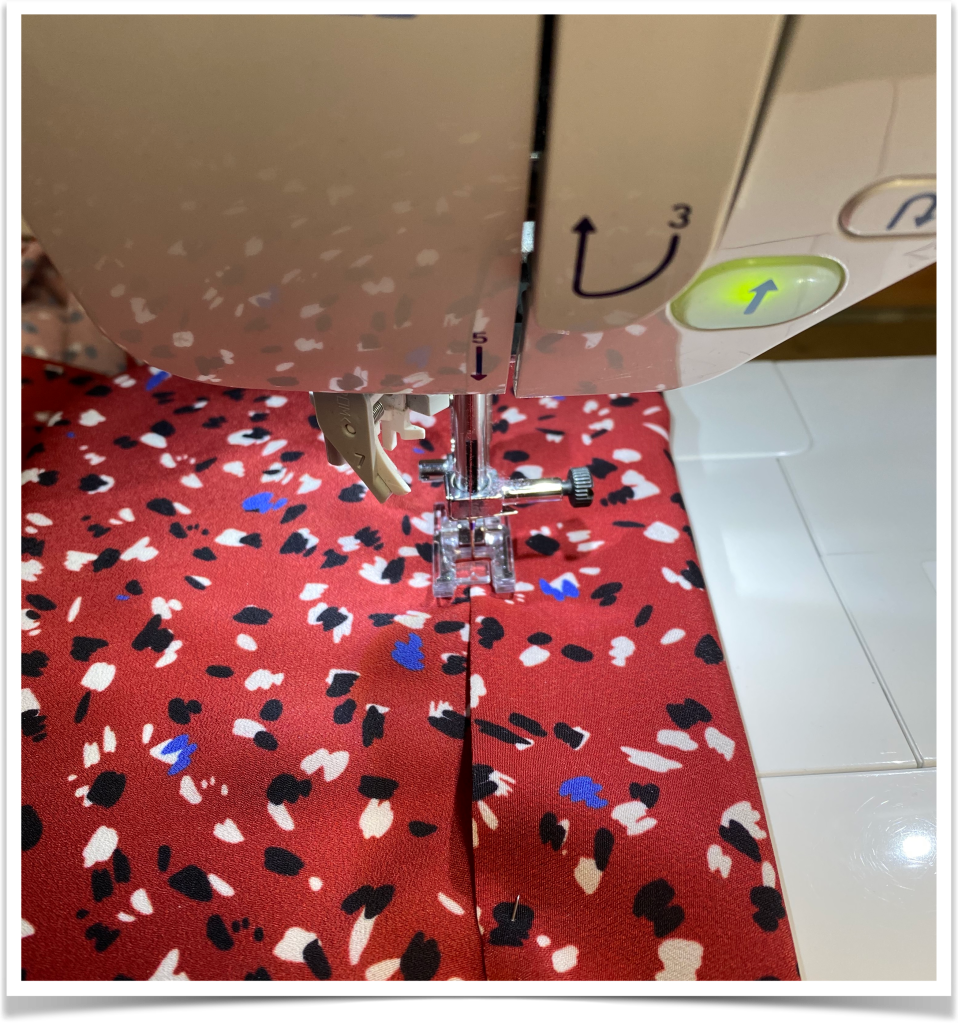
I fiddled around with sample stitches.  Initially my seams puckered, but by loosening the tension, and going to a much shorter stitch length I was able to correct that.

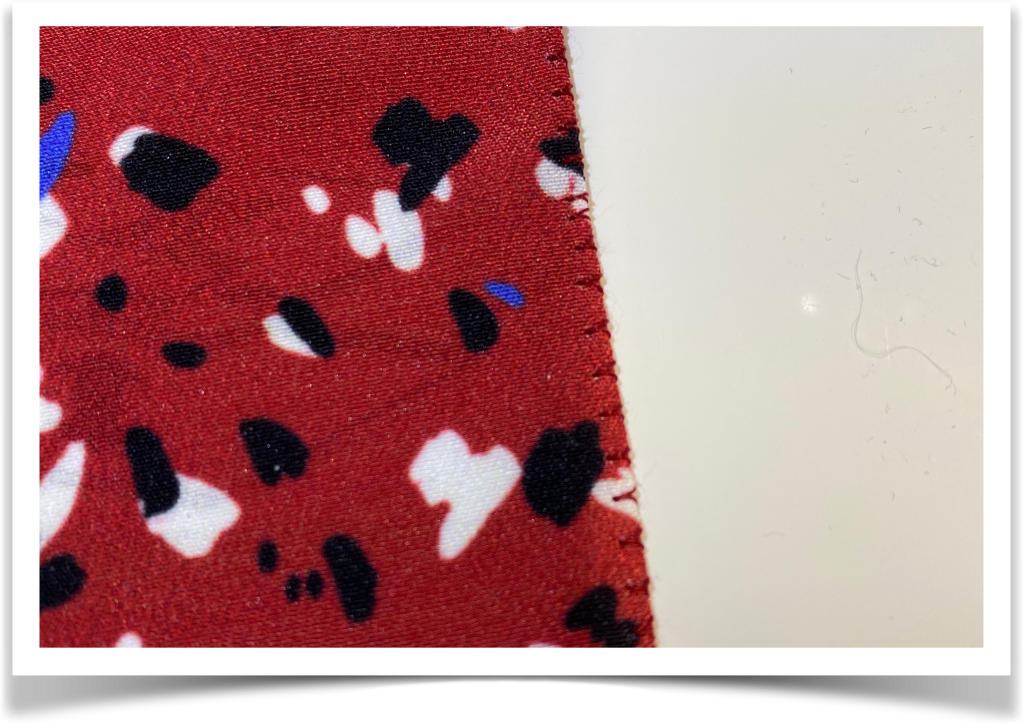
In order to have a neat edge on the lower front facing I cut a 2 cm strip of very fine interfacing (Bosal Envy Silk Interfacing) and used a standard 3 thread overlocking stitch on my Juki 654 Serger. To stop the pockets fraying I simply zigzagged them on my Juki DX7 sewing machine, which resulted in a neat, partly rolled edge (see photo below)  My current favourite thread is Madeira Aerofil Polyester, it comes on a 400m spool and it is finer, so it lasts longer.

I made the size to fit my bust measurements but its a loose fitting garment so the size wasn’t crucial and is easily adjusted.

simple zig zag edge for inside pockets

/

Requirements
Jalie 3889 Melanie Robe
2.75 metres of fabric
Fine interfacing (optional)
Polyester sewing thread
Size and Alterations
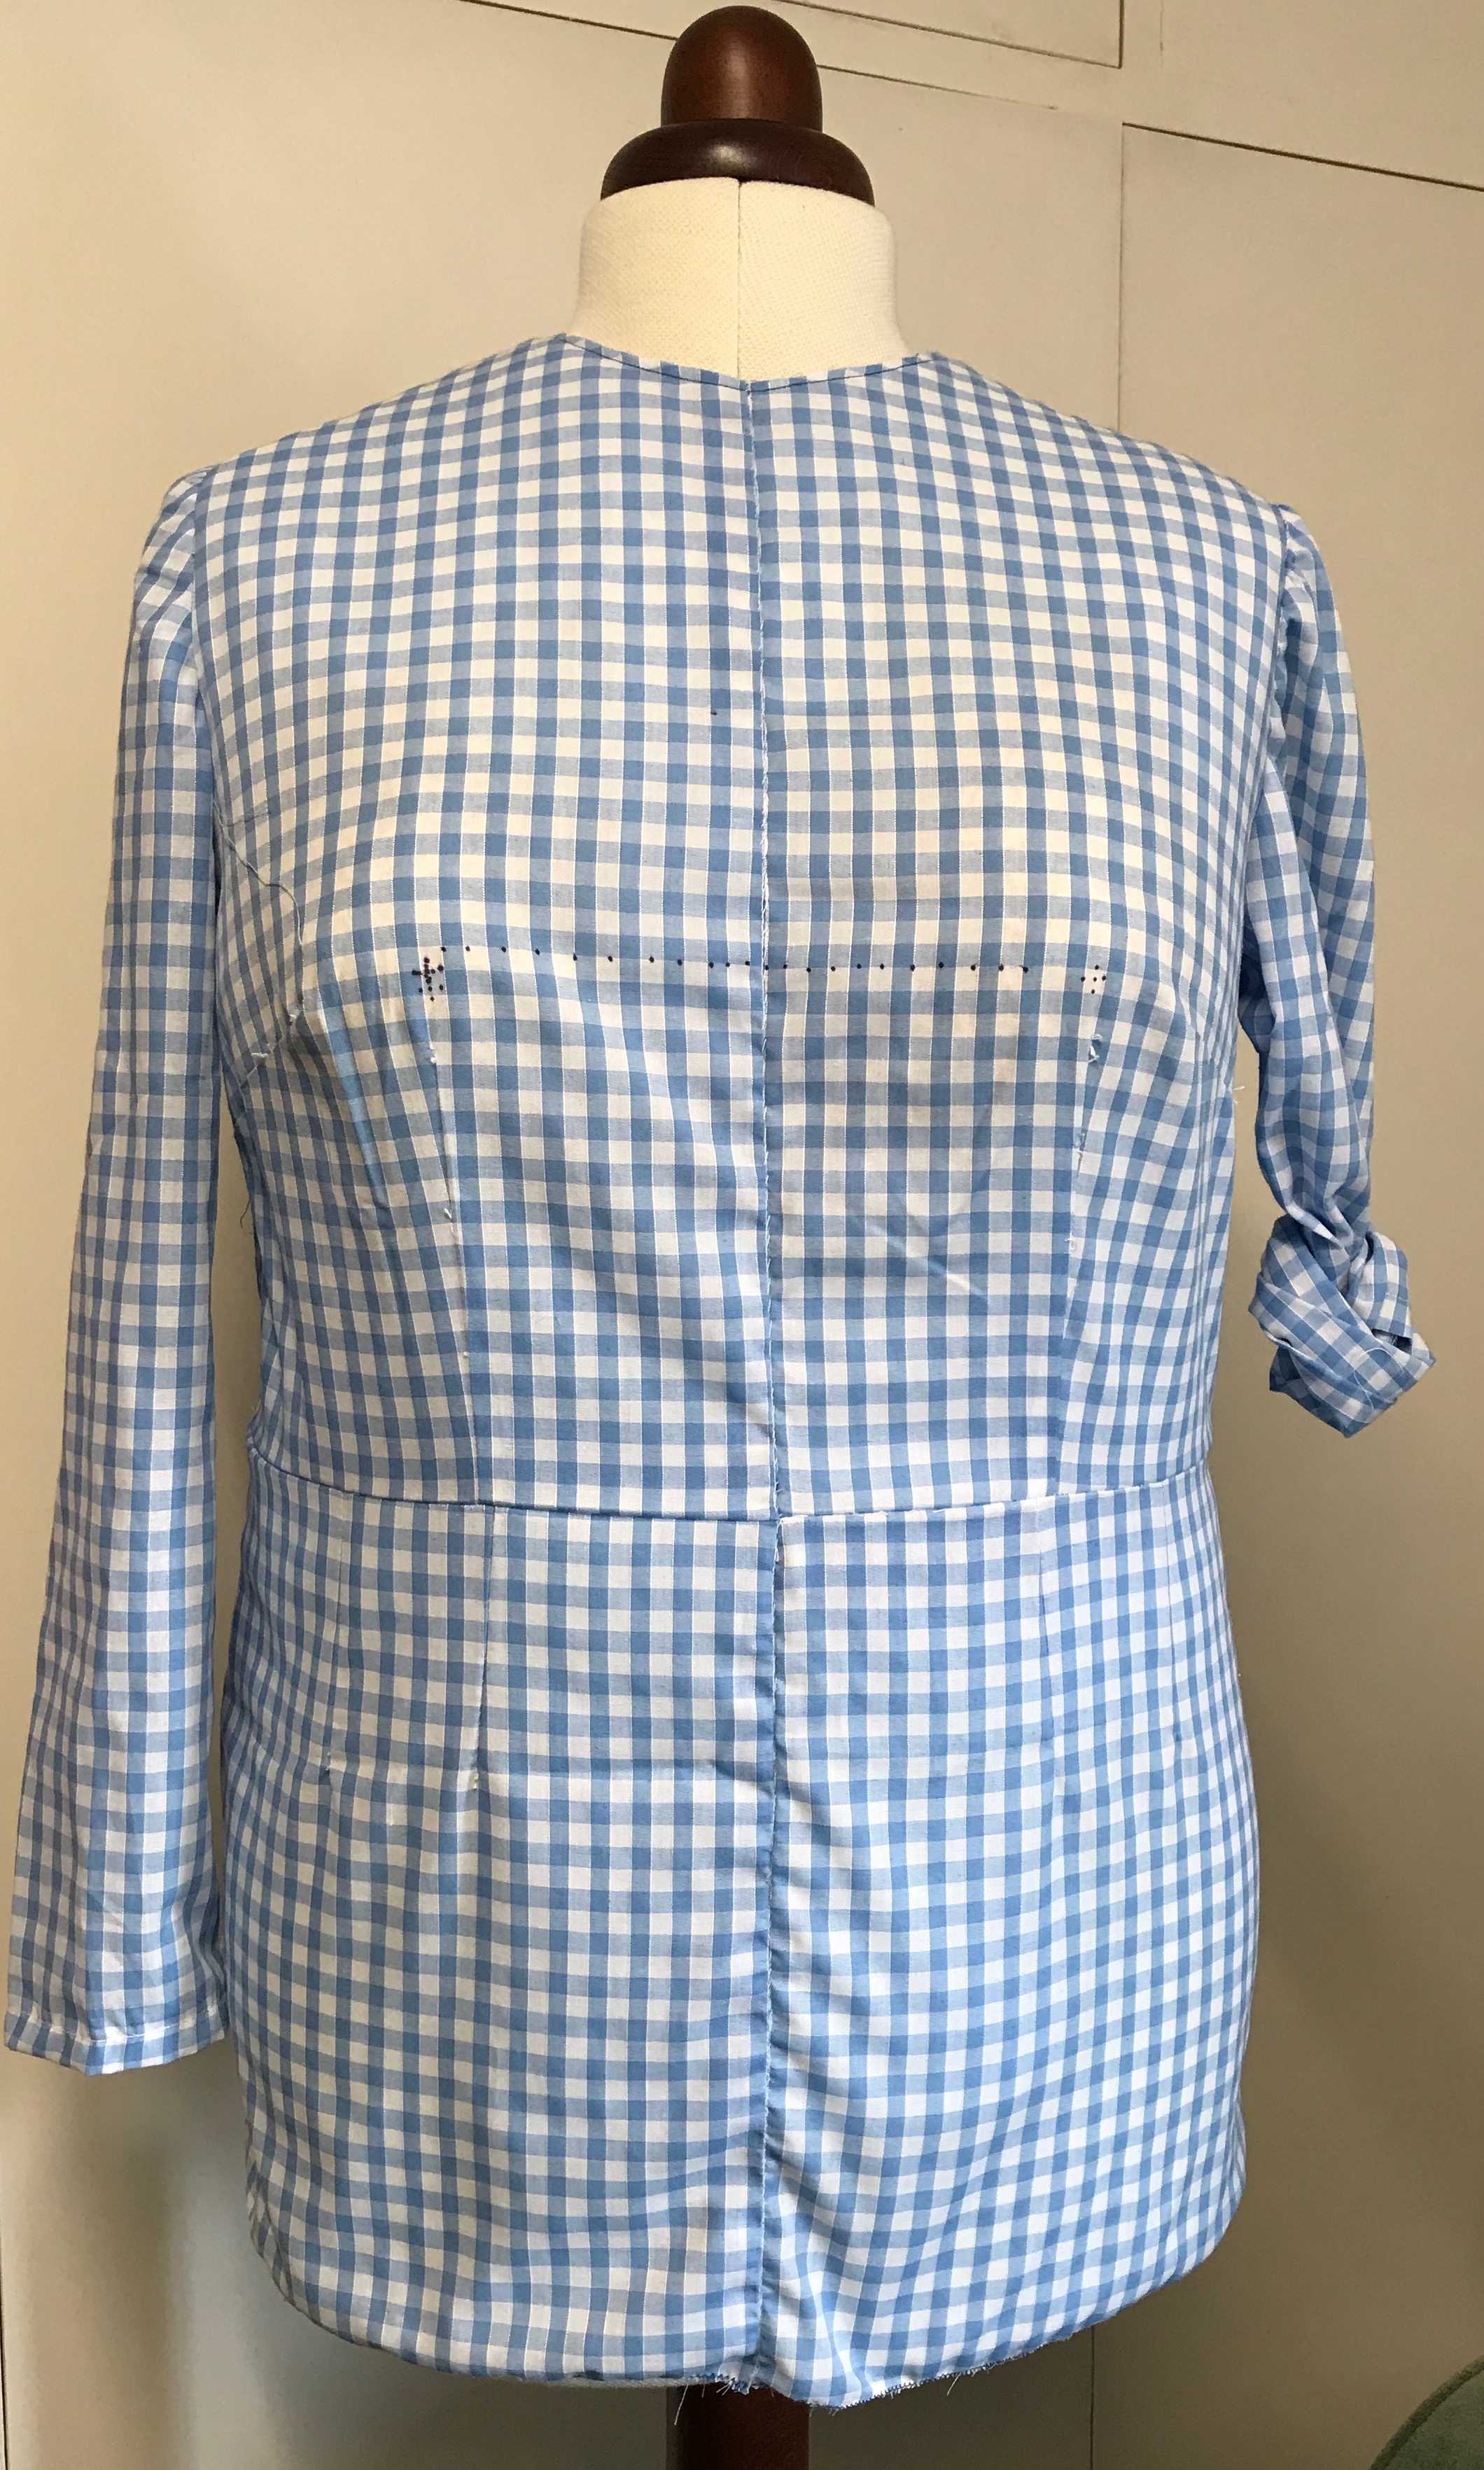
I made size Z for a 42” bust measurement. The pattern pieces are all very square, the only alteration I made was to scoop out the back neckline by 2 cms. this altered the neck circumference so I also lengthened the neck bands by 1.5cm on each end.
Considerations
Mark all notches and dots. Sewing fine fabrics needs a bit of care. I used a new Microtex 70 needle, I tried a few others before settling on this. Test stitching showed some seam puckering, that you could smooth out with your fingers, suggesting that more thread was needed in the seams, so I loosened the thread tension and shortened the stitch length to 1.6mm, removing any puckering. I also used a hot iron with steam to press all the seams and hems.

topstitching the front band in place (note edge of band lined up with side of mark on foot)

Sewing Notes

Instructions are printed directly on the pattern, but visit jalie.com/melanie  and you can  download and print off the instructions

  • Instructions omit to tell you to cut the belt loop strip into 2.  Nobody needs 20cm long belt loops!
  • I included a hanger loop attached to the wrong side of the neck before attaching the neckband.
  • To sew the neckband, I marked the centre back of the neck, pressed down 1cm along the long edge of the neckband and pinned the other long edge with the right side of the band to the wrong side of the neck and front edge, stitched and pressed. Stitched the short edges, folded the band to the right side and top stitched it down as close to the edge as I could.  I find this method the best way of finishing a band neatly, rather than doing it as described in the pattern: you don’t miss any bits on the wrong side. Hand-stitching long bands is not for me on projects like this.

My thanks go to Lucy at http://www.sewessential.co.uk for the fabric, pattern and opportunity. This is a good starting point for a lot of future family gift making. Last year was pyjama bottoms, next year dressing gowns. Where to go from there I wonder…..

Small scrap-busting projects for hard times

Now, due to restrictions placed on us by the arrival of unwanted viruses, it is time to take stock.

I have a ridiculous amounts of fabric, all of which were bought with something particular in mind – often long forgotten. I need to organise a system to keep track of my original plans and subsequent changes of mind! I have my patterns on Evernote, and have also tried Trello. I need to try harder.

I have most of my stash documented on Cora (an app which catalogues fabric) It took a while to set up but as long as I remember to keep it up to date when I get something new, or use something up, then it does a decent job of letting me see what I have to work with. You can get it for various platforms and read about it here

I also have a large box of leftover scraps, which I always save in case there is enough to make something useful out of. I thought that during this period of isolation I would look at my bits and find uses for them.

Simple cotton facemask, lined with flannel

The first thing I came up with was a face mask. All the wisdom says that a mask won’t protect you from the virus, but it may help to reduce the spread of any germs you may already be carrying with you. They seem to be very popular with foreign visitors if news photos are anything to go by, and there are also other applications, my favourite being to make matching adult and child ones so children having to go through unpleasant treatments can see a parent wearing a matching mask (maybe with a funny cartoon theme) and lessen their anxiety.

There are many YouTube video with instructions available, so rather than re-invent the wheel I chose one of those to follow.

Quick Scrapbuster Face Mask

I followed a YouTube Video by Kathy Braidich of “The Turban Project”

YouTube video from Kathy Braidich of The Turban Project

It is essentially two rectangles of fabric: adult size 9” x 6” child size 7.5” x 5” and two pieces of flat ⅛” elastic 7” long

Use a cotton for the outer and a flannel for the inner (I tried with thin fleece for the inner and it was a bit too bulky, but a brushed cotton flannel worked very nicely.)

the flannel is lovely and soft against your face

Use a cotton for the outer and a flannel for the inner, mine was left over brushed cotton shirting from Fabworks that I used for a dress. (I tried with thin fleece for the inner and it was a bit too bulky, but a brushed cotton flannel worked very nicely.)

The two pieces of fabric are laid right sides together, the elastic is inserted at the corners, one piece on each short edge.  Stitch round the edges, leaving a 2” gap on one long side.  Turn through, put a couple of pleats in the side to give it some shape, top stitch to hold flat and seal the gap. Bobs your uncle.  Very detailed instructions are in the video.

The pivot function on my Juki DX7 was really handy when sewing this, and I took the opportunity to use one of the built in embroidery stitches to decorate the edges. I like to take every opportunity to use the great selection of built in stitches on my machine.  Realistically there aren’t that many opportunities when I am making clothes for myself, but they adorn lots of my grandchildren items, and when making things like this project they add an element of fun and personalisation.

I have started to add secret messages into the facings of my grandchildrens’ clothes and they love the excitement of seeking them out.  It is an idea I borrowed from Jen (@jenerates) one of my fellow Juki Ambassadors.

‘Janni loves Jessica’sewn into the facing of a little jersey dress

This mask uses small pieces of fabric and comes together really quickly. I am on the lookout for other simple quick sews. If you have an idea to share why don’t leave a message in the comments section below.

I thought I had retired!

My life slowed down a few years ago, I stopped working and found more time for myself. I started painting, sewing, doing more sport – skiing, sailing and golf. Time took its toll and we stopped skiing and sailing when my husbands mobility reduced.

Now we mainly play golf (thanks to an electric buggy for him – I still walk) and I sew, and sew and sew!

As a result of appearing on The Great British Sewing Bee series 5 in 2019 I find my life is much fuller. I have done lots of talks, and the interest continues. I have been invited to sewing events, exhibitions and have found myself sharing my knowledge and experience through teaching.

A quilt for my baby grandson sewn on my new Juki DX7

I am also happy to be a Brand Ambassador for Juki Sewing Machines. I have had a Juki overlocker for many years, and a Juki coverstitch machine for two years. I love them both and they do exactly the jobs I ask of them without fiddling or drama. I was delighted when the opportunity arose to use a Juki sewing machine (a DX7) and I am very impressed with that too. I will be at the Juki Sewing and Quilting Retreat in Lincolnshire in February and at Sewing for Pleasure at the NEC Birmingham (UK) in March, teaching and chatting on the Juki stand alongside my good buddies and fellow Bees Jen (@jenerates on instagram) and Mercedes (@ohsewthatmercedes)

My next teaching class is local to me in the lovely North York Moors National Park at Belmont Studios (www.belmontstudios.co.uk) two days – residential or daily – in a great working space and Tony and Anne run a delightful B&B. You can also find details of this course at www.craftcourses.com

Maybe I will see you at one of these event. I hope so.

@jannisews

New avenues – teaching

I have always been happy to share what I know, and it makes me happy to help others get the same joy from making as I do.

To that end, this autumn I will be teaching a series of classes covering all aspects of making with fabric:

My first session is quilting.

Quilting can be as complicated or simple as you wish, we will look at all the techniques required to make a quilt, in the guise of a table-mat.

We will cover:

A simple piecing technique using pre-cut strips of fabric – of course there is a myriad of design choices here, but we want something that can be completely finished in one day.

Make a quilt sandwich, layering the pieced top, wadding (also known as batting) and the backing fabric and fastening them together in preparation for quilting

Quilting the layers together with either straight rows of stitching or free motion stitching.

Creating a binding strip and how to finish the edges.

All these techniques will arm you to create a quilt of any size, although you will take home a finished tablemat.

All materials and equipment are included. Students will need to bring their own fabrics and backing fabric. Advice as to quantities will be sent out before the class.

7.5 hour workshop. Refreshments provided. Please bring your own lunch.

When: Wednesday 25th September 2019 9.30am – 5.00pm

Cost: £65.00

Where: Wath Court Craft Rooms, Hovingham, York YO62 4NN

Find out more here

Book online now http://www.wathcourtcraftrooms.co.uk/book-online/4594492019

a trip down a road less trodden


(a reluctant display of the bits of me I don’t normally show off))
Bits of me I am not too happy showing off

Some years ago my mum bought me an adjustable mannequin. I fiddled endlessly with the wheels to get them to match my measurements – sadly the waist measurement wouldn’t go quite as large as mine, and the small size of my hips in comparison to my other measurements made the wheels strain at their screws.

I knew I had to do something to it to move it higher up the usability scale from mere coat-hanger. I had two items squirrelled away that were going to help me in my task, a lot of odd pieces of quilt batting, and a muslin made at a drafting course at English Couture last autumn (which I can thoroughly recommend)

Padding applied the stitched to the original mannequin

Starting with the muslin, which I knew fitted me very well, I put it on the mannequin, which had been twiddled to match my measurements as closely as possible, then I assessed the bits that needed packing out. Pinning the small(ish) pieces of batting on the mannequin until the muslin was well stuffed took a bit of time and trial and error, but when was satisfied I stitched it all together, with fairly random, large stitches.

There was a significant gap down the centre front, back and the sides, where the parts of the mannequin were spread apart. In order to use the mannequin for draping techniques the centre front and back need some solidity to pin into, so I stitched strips of felt to be covered by the wadding. I look forward to designing patterns by draping as an addition to my growing pattern drafting skills.

It was then simply a case of deciding when enough was enough, putting the muslin in place and stitching it closed up the centre front. I had already turned in the neck edge and stitched it down, and overcast the bottom edge and Voila!

The questions that now remain:

I like the defined neck edge of the muslin, it gives me a clear indication of where a collar needs to sit. The muslin seams show where I need to position my shoulder seams to cater for my high round neck and forward shoulder, and I can clearly see where to put various necklines in relation to my own physiognomy.

I also like the shoulder seams that indicate my armhole position. I left the sleeves in situ on the toile, but the arms do get in the way of garments that I put on the mannequin so I need to address that, without loosing the armhole seam line indication.

I find the gingham pattern of the fabric of my original muslin, whilst it is very useful as an indication of straight grain and horizontals, is very distracting when assessing the attributes – or otherwise – of items in construction. I will make a plain jersey pullover as an alternative cover, then apply tape to indicate those important lines.

gingham muslin mounted on padded mannequin
the original individually fitted muslin stitched onto the padded mannequin


One of the real benefits of my mannequin, even when it didn’t match me, was as an aid to fitting knit neckbands. Prior to this revelation it was a hit and miss affair based on a rough estimate of ±80% of the neck edge. Now it’s a case of putting the neckless knit garment on the mannequin so that the shoulders and armholes sit nicely in the right position. Cut a neckband to the desired width, then folded double, and the length of the measured cut edge of the neck edge, then starting at the shoulder seam, pin the neckband so that it sits naturally at the folded edge, and stretched to fit the cut edge. mark the length with a pin, stitch a small seam to join the circle, then sew to the cut edge in your preferred fashion.

My preferred method of joining neckbands to knit tops after fitting the neckband onto the top on the mannequin, is to stitch it with a small zigzag on my sewing machine, then overlock the cut edge (to approximately 6mm – or 1/4″). I can then use my coverstitch machine to finish the the accurately finished serged edge and give really neat finish.

Conclusion: The end result is quite an apparition, it certainly looks much better covered up, but it is a really useful sewing and fitting aid. It is infinitely better than the original because it reflects the individual quirks and contours of my own body, and has an eerie similarity in its tactile quality and squishiness to my real body. Its very best quality has to be that it is really easy to snip away bits to reflect weight losses, or to to add extra bits should I eat too much.

Until the next time I have something useful to say –

Make 9, or 10 or 1 a week for 52 weeks?

I was never sure quite what was the point of the Make 9 challenge. I am a bit of an ad-hoc sewer, I make whatever takes my fancy at the moment. Fortunately I have distinct preferences in my colour choices so I tend to end up with a reasonable level of co-ordination.

I am quite a prolific maker, often producing more than one item a week (although not all for myself) I have two granddaughters and a daughter who hasn’t much time to sew, so making only 9 seemed initially a bit limiting.

However – we have been away from home, and my sewing machine, for six weeks and I had plenty of time to consider my sewing future.

Make 9 for 2019

During my enforced hiatus I started to think about what I might actually need in my wardrobe. Actually the most urgent wardrobe need is space; to remove a large portion of what no longer – and realistically never will – fit me. I have a lot of business clothes from the days I ran a high end ladies fashion boutique, and at least 3 mother of the bride/groom outfits, I was a shadow of my current self a decade ago.

Skiing in the French Alps and sailing with friends in Croatia

My lifestyle has changed. We used to ski and sail a lot, but my husband now has what my granny used to refer to as “a bone in me leg” i.e. he has a bad knee. So we took up golf last summer, I get to walk as much as I like, he can ride on a buggy and we get to do something together. Win win (I usually do!)

All this means I now need a different type of sportswear. I am not a fan of the regimented selection of golf clothing available, and most of it doesn’t accommodate my Apple waistline, so to make myself golf gear is a new consideration.

I have been looking at ladies golf gear offerings and am not inspired by them, but I have a couple of basic needs. Warmth, freedom of movement and to get my pasty white pins out.

I have found a Gilet pattern I like, the Willa Vest from LaelaJane and the StyleArc Maggie shirt, which I think would work well with a woven yoke and jersey body. It shouldn’t be too difficult to add a collar too. I also fancy some long shorts, which may well be Lander Pants in a longer length than the shorts on the pattern envelope.

As far as fabrics are concerned, I would like to use some of my considerable stash but I don’t have anything technical. I have found http://www.activefabrics.co.uk to have a good choice of plains in technical fabrics, and http://www.fashion-formula.com to have a good choice of base fabrics, and a couple of ready designed golf themed fabrics to order. Any more suggestions would be welcomed in comments below.

As for the rest, that leaves 3 bottoms and 3 tops, I can fill those in from my immediate ‘what I want to sew’

1. Jeans: I have some Cone Mills Denim I have been hoarding. I have already made Closet Case Patterns Ginger Jeans but made considerable waist alterations, and I am considering the Cashmerette Ames Jeans to accommodate my apple waist. I have recently revisited the Ginger Jeans with an amendment to a higher rise, which I prefer,

Closet Case Patterns Ginger Jeans

2. Stretch pants: Always a lover of comfort, I have made Jalie Eleonore in the past, but I like the look of DesignerStitch Harley pants.

Designerstitch Harley Pants in Ponte Roma

3. A pinafore dress. I have some lovely floral needlecord that I bought from SewMeSomething at the Harrogate Knit and Stitch Show last Autumn. I have a couple of choice options, the SewDifferent Pocket Pinafore, and the Marilla Walker Roberts Collection Pinafore Dress. I also have McCalls M7547 which hopefully I can hack into a skirt rather than dungaree.

Sew Different Scoop Pinafore and McCalls M7547 dungarees

4. A shirtdress. My first make when I returned to sewing in 2015 was a Grainline Alder, which I like except that it is sleeveless, I hate showing the tops of my arms, I had to do a large FBA and didn’t know to remove excess width from lower down so it’s a bit swingy.

I will use the DesignerStitch Sedona Shirtdress which appears to answer all my calls, it has sleeves, a selection of cup sizes and a slimmer line, which I favour for this summer. I also have some lovely floral viscose that I found in my local fabric shops The Fabric Bird in Thirsk.

Designerstitch Sedona Shirtdress

5. A simple jersey dress to replace a much worn RTW one which is looking distinctly shabby. I am thinking Cashmerette Pembroke in French Terry, which I find a perfect weight for the average English summer. I have plain Navy Blue, always a favourite in my house.

Cashmerette Pembroke dress and tunic

6. A leather jacket. This will be my spring project for the dressmaking and pattern drafting class I go to. I found some buttery soft leather pieces on a trip to Spain, I have taupe for the outer and red for collar and facings, and a pattern that came with LoveSewing magazine, Butterick B6497.

Butterick B6497 Jacket

Together with my Golf Capsule, that Makes Nine. Eventually I have achieved a selection which, at this moment in time fits my needs. All that remains is to make room in my closet. Now there is a challenge.

For now,

Whys and Wherefores

The primary purpose of a blog for me, listening to the cries of ‘blogging is dead – let’s move onto Instagram and ever newer means of insta-communication” is to record: my thoughts, my experiences and my ideas; to communicate with a larger world than I have ever experienced and to find others of my generation (not exclusively by any means) who have only ever sewn in solitude.

As I progress deeper into my sewing life, I started when I was 18, some 52 years ago, a lot of needles have been broken and seams ripped. I came back to sewing in 2015 after a lengthy hiatus, to find a totally different world. Technology, whilst it has it’s demons, has huge benefits for all of us who create, not least as a learning tool, but particularly for me as a shopping tool and a diary tool.

So I shall start. I have a 3 year backlog of things to talk about, so I will begin at the end, the point I am at now, and slip in things I made earlier. Some of these you may have seen on my Instagram accounts. Others not.

I recently discovered The Sewing Workshop patterns. They have a style which accommodates my middle age spread, which continues to spread into old age (I like wine and food too much – and my hobbies don’t allow that much time for excercise.

My current favourite pattern from The Sewing Workshop is the Frankie Shirt

Frankie Shirt from The Sewing Workshop

I made a test version from some fabric bought from a stash clearance. It was £1.50 and marked on the selvedge as ‘Tebilized’, a trademark used by Tootal for a crease resistance process in the early 1970s.

I cut size L. Normally I would do a Full Bust Adjustment, but reading comments suggested it wasn’t necessary because of the lowered armholes and loose bodice. I cut the back and under-sleeve sections with a 90° grain line to accentuate the style lines, and lowered the back neck by 1cm, which is a common alteration for me, but in wear I didn’t need it so on the final garment I reverted to the original.

On the final garment I altered the collar so the meeting point was at the centre front rather than at the edge of the front band, lengthened the sleeve 5cms, and reduced the depth of the back pleat by 50% leaving it to fall softly rather than pressing into a sharp pleat

The fabric was a gift from a friend, African Wax print in my favourite colour, purple. The pattern matching on the front took a bit of thinking about so that it would match despite the grown on front band but cutting as a single layer got the effect I wanted.

This was my first experience of sewing with wax print cotton, I washed it before cutting, it released a lot of purple dye into the water but it was still strikingly brilliant afterwards and was very easy to sew and finish.

I have some more in my stash and am busily planning what to make with it. Watch this space!